How to Fix All .DLL Files Missing Error In Windows 11, Windows 10
Fix All .DLL Files Missing Error
Table of Contents
What is DLL?
DLL stands for Dynamic Link Library. It is a file format used in Microsoft Windows operating systems to store and share reusable code and resources among multiple programs. A DLL file contains functions, data, and resources that can be accessed by multiple applications simultaneously.
DLLs provide a way to modularize software by separating common functionality into separate files. This allows developers to write code once and share it among different programs, reducing duplication and making maintenance easier.
When an application needs to use a function or resource from a DLL, it dynamically links to the DLL at runtime. This means that the necessary code is loaded into memory and made available to the application when needed. DLLs are loaded and managed by the operating system’s dynamic linker, which resolves function calls and manages memory.
DLLs are commonly used for a variety of purposes, such as providing operating system functionality, implementing device drivers, extending application capabilities, and facilitating plugin architectures. They can be developed using programming languages like C, C++, or C#, and they offer a way to extend and customize software without modifying the original source code.
Why .DLL missing error occurs?
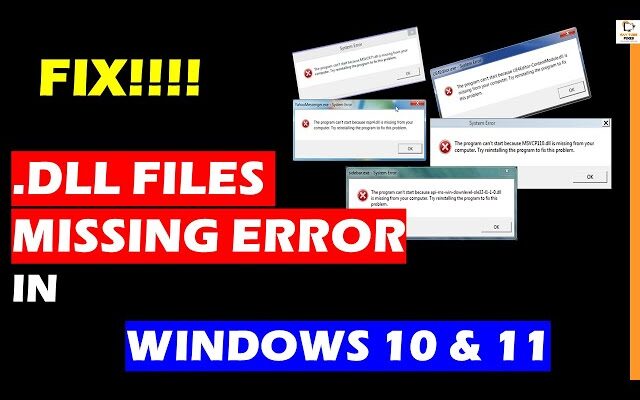
DLL missing errors occur when a program or application is unable to find a required DLL file at runtime. There are several reasons why this error may occur:
- DLL file is not present: The most common reason is that the DLL file itself is missing from the system. It might have been deleted, moved to another location, or not installed properly.
- Incorrect DLL version: If a program is designed to work with a specific version of a DLL, but a different version is present or missing, it can cause compatibility issues and result in a DLL missing error.
- Corrupted DLL file: If the DLL file is corrupted or damaged, it may not be recognized by the operating system or the program that requires it.
- Incorrect DLL file path: If the program is unable to locate the DLL file due to an incorrect file path or directory, it will result in a DLL missing error.
- Dependency issues: DLL files often have dependencies on other DLLs or system components. If one of the dependent files is missing or incompatible, it can lead to a DLL missing error.
- Malware or virus infection: Malicious software can sometimes delete or modify DLL files, leading to missing DLL errors.
How to fix .DLL missing error in windows 10, windows 11?
general steps you could take if you receive such error messages
1. Run System File Checker
To effectively address DLL file missing or corrupted errors in your Windows operating system, the recommended approach is to utilize the built-in System File Checker tool. This tool is designed to replace any missing or corrupted system files. Follow these steps to use it on your Windows 11/10 computer:
- Right-click the Start button on your computer to open the WinX Menu.
- From the menu options, select “Command Prompt (Admin).”
- In the elevated Command Prompt window, copy and paste the following command
sfc /scannow - Press Enter to execute the command. The scanning process may take approximately 10 minutes to complete.
- Once the scan finishes successfully, it is advisable to restart your PC to ensure the changes take effect.
- If desired, you can also try running the “sfc /scannow” command in Safe Mode or during the Boot Time, as these approaches might yield better results.
2. Run DISM to repair the System Image.
To resolve DLL missing errors, you can also use the Deployment Image Servicing and Management (DISM) tool along with the System File Checker (SFC) tool. DISM is a command-line utility in Windows that can repair the underlying system image and help fix issues with DLL files. Here’s how you can run DISM to repair the system image:
- Open an elevated Command Prompt by right-clicking the Start button and selecting “Command Prompt (Admin).”
- In the Command Prompt window, type the following command and press Enter:
DISM /Online /Cleanup-Image /RestoreHealth
- Wait for DISM to complete the process. It may take some time, as it will download and replace any corrupted files from Windows Update if necessary.
- After the repair is finished, restart your computer.
- Once your computer restarts, open an elevated Command Prompt again and run the SFC command to verify and repair any remaining system file issues. Enter the following command and press Enter:
sfc /scannow
- Wait for the SFC scan to complete, and if any issues are found, it will attempt to repair them automatically.
- After the SFC scan finishes, restart your computer once again.
Watch this video –
3. Copy DLL from another healthy system
To copy a DLL (Dynamic Link Library) file from a healthy system to another system, you’ll need to follow these steps:
- Find a healthy system: Identify a computer that has the same operating system version as the target system and a working copy of the DLL you need.
- Locate the DLL file: Navigate to the directory where the DLL file is located on the healthy system. DLL files are usually found in the Windows\System32 or Windows\SysWOW64 folder, depending on the system architecture (32-bit or 64-bit).
- Copy the DLL file: Right-click on the DLL file and select “Copy” from the context menu.
- Transfer the DLL file: Use a USB flash drive, network file sharing, or any other suitable method to transfer the DLL file from the healthy system to the target system.
- Paste the DLL file: On the target system, navigate to the corresponding directory where DLL files are stored (Windows\System32 or Windows\SysWOW64). Right-click in the directory and select “Paste” from the context menu to copy the DLL file to the target system.
- Register the DLL file (if required): Some DLL files need to be registered before they can be used by applications. Open a command prompt with administrative privileges (Run as Administrator) on the target system, navigate to the directory where the DLL is located, and execute the following command:
regsvr32 dll_filename.dllReplace “dll_filename.dll” with the actual name of the DLL file you copied. This command registers the DLL file in the Windows registry.
- Restart the system: Restart the target system to ensure that any changes are fully applied.
It’s important to note that copying DLL files from one system to another should be done cautiously. Make sure the DLL file is compatible with the target system and that you have the necessary permissions to perform these actions. Additionally, it’s always recommended to obtain DLL files from trusted sources or reinstall the software/application that requires the DLL file if possible.

