
How to create a recovery Drive in windows 11?
A recovery drive is an excellent technique to ensure that you do not lose data in the case of a catastrophic failure. It can help you troubleshoot and repair problems, even if your computer won't boot properly. You'll only need a blank, formatted USB flash device.
How to create a recovery Drive in windows 11?
Protecting Your PC and Files
Creating a recovery disc is a simple process. It does, however, take some time to develop, but it is well worth the effort because it might save you a lot of time and stress in the future.
- STEP 1

The first is to choose a large enough USB drive and then ensure that it is ready to use. The USB drive you choose cannot be used for anything else, such as storing other data, so be sure it is an extra or purchased particularly for the job.
- STEP 2
A simple Windows 11 recovery file will be less than 500 MB, but if you opt to include system files in the backup (recommended), you will want considerably more space. A simple recovery drive can be as small as 1GB, but a comprehensive recovery drive should be at least 8GB in size.
- STEP 3
Before you can make the recovery drive, you must first erase everything on your USB device. You may do this later during the setup procedure, or you can format it right now. It’s a good skill to have. Plug the USB drive in a free USB port on your computer.
- STEP 4
When you launch File Explorer on your computer, the USB flash drive should be listed in the sidebar. It will very certainly be labelled as the (E:) or (F:) drive. Select Format from the action menu by right-clicking on the drive label. Leave the default settings (FAT32) and then click Start.
- STEP 5
You should now be able to start creating your recovery disc. Enter “Recovery Drive” in the search field and choose the Recovery Drive app result. In later versions of Windows 11, you may also see the Recovery Drive in the main programmes list, which is accessed by pressing the Start menu button.

- STEP 6
Accepting the software to “make changes to this PC” will launch the setup wizard. This is the first page where you may select whether to back up system files using the recovery drive so you can reinstall Windows 11. If so, check the box and then click Next.

- STEP 7
After a few moments, you’ll be prompted to choose the USB flash drive you want to use. If you just have one USB drive plugged, it will be the only one pushed and will be picked automatically. You will be notified how much storage space the drive requires, and that all current data will be erased.

- STEP 8
On the following screen, click Create to start the procedure. This may take some time, so go make a cup of coffee and set it to run. If you need to know how far along it is, a progress bar is displayed. Do not Remove the USB device or switch off your computer before the operation is completed.
- STEP 9
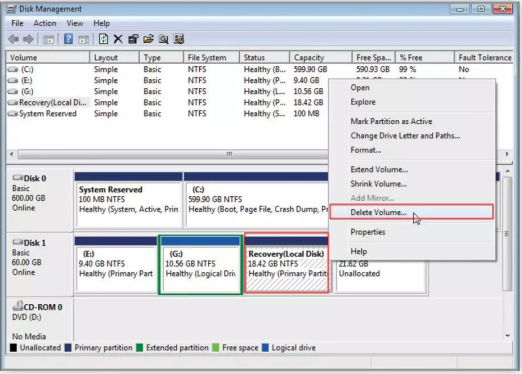
When the procedure is finished, you should be requested to erase the recovery partition on your PC in order to conserve space; as long as you want to preserve your recovery drive, this is safe to do. If you are unsure, leave the recovery partition in place; it may be erased later if necessary.

- STEP 10
You will not see this step if you do not already have a recovery partition on your machine. You will simply be notified that the recovery drive is ready and instructed to click Finish. Remove the USB drive from your computer and store it somewhere secure. Label the device so it is not reused.